Summary
The gilda with quail egg is, perhaps, the most elegant variation of the San Sebastian appetizer. The tiny size of the egg, its semi-liquid yolk when cooked correctly, and the creaminess it adds... In this guide: Quail egg in gilda: why it works, How to cook perfect quail eggs, How to peel quail eggs without destroying them.
The gilda with quail egg is, perhaps, the most elegant variation of the San Sebastian appetizer. The tiny size of the egg, its semi-liquid yolk when cooked correctly, and the creaminess it adds to the whole make it a superior gilda. It is common in the best pintxo bars in San Sebastián and Barcelona, and at home it can be made in ten minutes if you know exactly how long to cook the egg. Here is the complete guide.
The quail egg in the gilda: why it works
The quail egg is not in the classic original gilda, but its incorporation has a very clear gastronomic logic. The Cantabrian anchovies, piparra, and olive are three ingredients with very defined flavors and a relatively firm texture. The quail egg adds two things that the classic gilda does not have: unctuousness and neutrality.
The semi-liquid yolk acts as a link between the salt of the anchovy and the acidity of the chili pepper. When bitten, the yolk breaks and envelops the whole, softening the more aggressive edges of flavor and creating a more rounded mouthfeel. This is the same principle why egg works so well in carbonara or steak tartare: the fat from the yolk regulates the perception of more intense flavors.
At the same time, the quail egg adds protein and satiety, which makes the gilda a more complete appetizer. Visually, it also adds: the white of the egg and the yellow of the yolk when cut create a chromatic contrast with the brown of the anchovy and the green of the piparra that looks great in any presentation.
How to cook perfect quail eggs
The cooking point is the critical element. An overcooked quail egg has a dry yolk and an unpleasant sulfuric taste. An undercooked egg is difficult to peel and can be slimy. The ideal point is a semi-liquid yolk, which is achieved with seconds of precision.
The most reliable method: boiling water, exact time
- Bring water to a rolling boil: the water should be boiling vigorously before adding the eggs. Use a small pot with enough water to completely submerge the eggs.
- Carefully add the eggs: use a spoon to place them one by one. The thermal shock between the cold egg and the boiling water is what allows precise timing.
- Cook for exactly 3 minutes and 30 seconds: this time produces a creamy semi-liquid yolk with a perfectly set white. At 3 minutes the yolk is very liquid and difficult to peel. At 4 minutes the yolk begins to set completely.
- Immediately stop the cooking: as soon as the timer goes off, transfer the eggs to a bowl with very cold water and ice. This thermal bath stops the cooking at the exact point and greatly facilitates peeling.
If a completely set yolk is preferred (for serving to children or people who do not want a liquid yolk), extend to 4 minutes and 30 seconds. The result is a completely cooked egg but without the greenish tint around the yolk that appears when overcooked.
How to peel quail eggs without destroying them
Peeling quail eggs is the most intimidating part for those who do it for the first time. The shell is thin and there is an attached inner membrane that can pull off part of the white if pulled too roughly. With the correct technique, peeling is quick and accident-free.
- Wait in cold water for at least 2 minutes: the thermal contrast causes the membrane to separate slightly from the white, which facilitates peeling. Peeling hot eggs directly from the pot is always a mistake.
- Gently tap against the work surface: a light tap on the roundest end of the egg to create a small initial crack. Do not crush, just crack.
- Gently roll the egg under the palm of your hand: this movement spreads the crack throughout the shell without sinking your fingers into the white. The shell will be uniformly cracked.
- Peel under a stream of cold water: the water helps to detach the inner membrane without tearing the white. Start at the end where the initial crack was made and pull the shell in long strips instead of small pieces.
Once peeled, the eggs can be stored in cold water in the refrigerator for up to 24 hours without losing quality.
Related Bacalalo Products


Recommended Products

Artisan Cheese Gilda Hand-Made Gou...
9,75 €

Caper Berries in Vinegar - 1400g (600 g Drained)
9,95 €

Artisan Pickled Onions - 1.4 kg
9,90 €

Artisan Anchovy Gilda Hand-Made ...
9,90 €
Refrigerated shipping 24-48h throughout the Peninsula
Complete assembly step by step
Ingredients for 12 gildas with quail egg
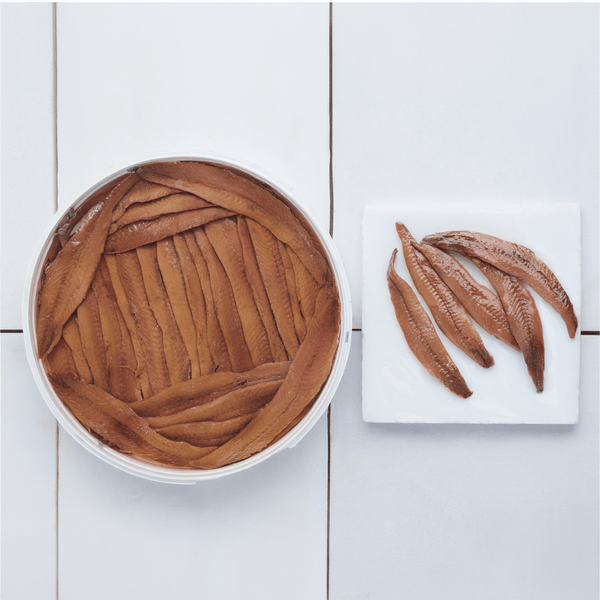
- 12 Cantabrian anchovies in olive oil (caliber 00)
- 12 Gordal or Manzanilla olives, pitted
- 12 piparras in vinegar
- 12 quail eggs
- 12 long wooden toothpicks
- Extra virgin olive oil for finishing
- Flaky salt (optional, for finishing)
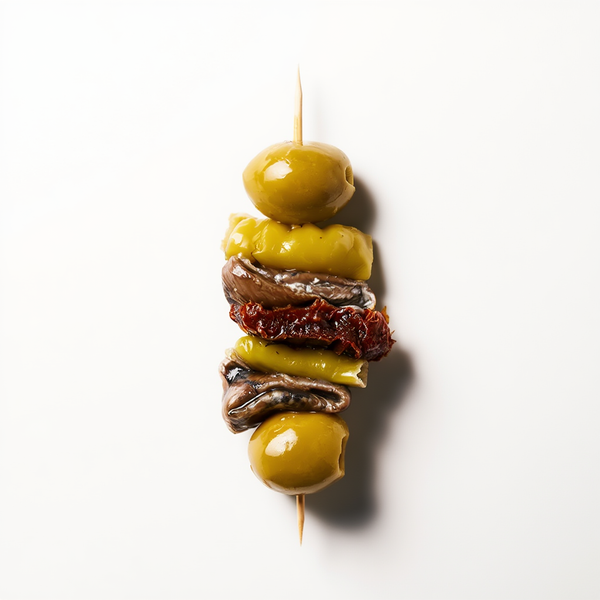
Assembly
- Cook and peel the eggs following the method described above. Set aside in cold water.
- Drain the anchovies on absorbent paper for 2 minutes.
- Thread the piparra making an S from the thicker end.
- Add the olive in the center.
- Roll the anchovy over itself and thread it after the olive.
- Add the quail egg to the end of the toothpick: the egg goes on the end because it is the most delicate ingredient. It is threaded through the narrower end very gently so as not to break it. If the yolk is semi-liquid, threading should be careful so as not to pierce the yolk.
- Finishing: a few drops of extra virgin olive oil over the assembly. Optionally, a few flakes of salt on the egg to enhance its neutral flavor.
The egg goes at the end of the toothpick for two reasons: it is the most fragile ingredient and placing it at the end prevents the others from crushing it when threaded; and visually, the white of the egg at the end works as an elegant finishing touch to the composition.
Variations of the gilda with quail egg
The quail egg is so compatible with the gilda structure that it allows for different combinations of the other ingredients.
With anchovy caliber 00 (the luxury version)
Using the largest and best available anchovy elevates this gilda to a miniature haute cuisine level. Caliber 00 has more flesh, more fat, and more depth of flavor, which better balances the smoothness of the egg. This is the recommended version for special occasions.
With pickled anchovy (fresh version)
Substituting cured anchovy with pickled anchovy produces a lighter and more acidic gilda. The pickled anchovy and quail egg have flavor profiles that complement each other well: the acidity of the marinade contrasts with the creaminess of the yolk. It is an excellent option for the summer months.
With marinated salmon
A less orthodox but very effective variation. A strip of salmon marinated in salt and sugar, rolled like the anchovy, produces a gilda with a milder flavor and more accessible for those who are not big fans of cured anchovies. The egg and salmon have a natural affinity that needs no explanation.
With cheese and egg
The most complete version: chili pepper + olive + cube of cured Manchego cheese + rolled anchovy + quail egg. It is the most substantial gilda of all, perfect as a single appetizer before a light meal. The assembly order is the same, with the cheese between the olive and the anchovy, and the egg closing the toothpick.
For how many people and when to prepare them
Gildas with quail egg are more elaborate than the classic ones, but the additional time is minimal if organized well. For 20 people as a pre-meal appetizer, calculate 3 gildas per person = 60 eggs. With practice, cooking and peeling 60 eggs takes less than 20 minutes.
The best time to prepare them is on the day of consumption, ideally between 2 and 4 hours before. Peeled eggs can be stored in cold water in the refrigerator without problem. The final assembly is done in the last 30 minutes before serving. Store assembled gildas in the refrigerator, covered with film, and take them out 15 minutes before serving so they reach room temperature.
For catering events, gildas with quail egg are a high-impact appetizer with a reasonable cost. A quail egg costs approximately €0.25 and the preparation time per unit, once you have practice, is less than a minute.
Frequently asked questions about gildas with quail egg
How long exactly should quail eggs be cooked for gilda?
3 minutes and 30 seconds from when the water boils, followed by an immediate cold water bath. This time produces a creamy semi-liquid yolk with a perfectly set white. If a completely solid yolk is preferred, extend to 4 minutes and 30 seconds.
Can pasteurized quail eggs be used?
Pre-cooked and peeled pasteurized quail eggs sold in some supermarkets greatly facilitate preparation, but their yolks are completely set. They work for the gilda format, although the creaminess of the semi-liquid yolk, which makes this version special, is lost.
Is the quail egg eaten whole in the gilda?
Yes, in a single bite along with the rest of the ingredients. This is the correct way to eat any gilda: the entire skewer at once. When bitten, the yolk breaks and envelops the other flavors. If the gilda has been assembled with the egg at the end, when bitten the egg breaks first and the yolk immediately permeates the whole.
How many quail eggs per person?
One gilda = one egg. The calculation of gildas per person is the same as for classic gildas: 2-3 as a pre-meal appetizer, 4-6 if they are the only appetizer for an informal gathering.
Can gildas with quail egg be made the night before?
The eggs can be cooked and peeled the night before and stored in cold water in the refrigerator. Assembly, however, is best done on the same day. An egg assembled in a gilda and stored in the refrigerator for more than 12 hours loses texture in the white and can absorb the piparra flavor excessively.
Where to buy Cantabrian anchovies to make gildas at home?
At Bacalalo, since 1990 in the Mercat del Ninot in Barcelona, we work with caliber 00 Cantabrian anchovies cured in salt for more than twelve months. You can find them in our market store or in our online store, with shipping throughout Spain.
Products that may interest you