

Summary: Buying whole salt-cured anchovies and cleaning them at home is the most economical way to access exceptionally high-quality anchovies, and it allows you to control the salt level exactly to your taste. In this step-by-step guide, we explain the complete process: from the initial desalting to the final packaging in olive oil, with exact timings, necessary materials, and tricks used by professional canners. With 35 years of experience working with anchovies at Mercat del Ninot in Barcelona.
Contents
- Why Buy Salt-Cured Anchovies (and Not Canned)
- Materials Needed Before Starting
- Step 1: Desalting, the Most Important Stage
- Step 2: Opening and Filleting the Anchovy
- Step 3: Cleaning Bones and Skin
- Step 4: Properly Drying the Fillets
- Step 5: Preserving in Olive Oil
- Professional Tips for a Perfect Result
- How Long Do Homemade Anchovies Last?
- Frequently Asked Questions
Why Buy Salt-Cured Anchovies (and Not Canned)
Updated March 2026. What we tell you here comes from serving thousands of customers in Barcelona.
Whole salt-cured anchovies are the same product found inside a can of premium anchovies, but in the stage before filleting and oil packaging. The cannery sells whole salt-cured anchovies primarily to restaurants, hospitality professionals, and domestic consumers who know what they're doing. The result, if done correctly, is exactly the same as buying a top-tier can — at a considerably lower price per gram of clean product.
There are three specific reasons to choose salt-cured over canned.
Price per gram of clean anchovy
A whole salt-cured anchovy has salt, a central bone, head, and viscera. The yield of clean fillet is around 40-50% of the gross weight, depending on the size of the fish. Our salt-cured anchovies for cleaning cost €5.95 per quarter kilo. At a 45% yield, you get about 112 grams of clean fillet in oil for that price — which is an unbeatable value compared to equivalent canned anchovies.
Total control over salt level
Canned anchovies already have their salt level determined by the cannery. Whole salt-cured anchovies give you complete control: more desalting time produces a milder anchovy; less time, an anchovy with more salt and character. For those with a clear preference for intensity, this is a real advantage.
The process itself
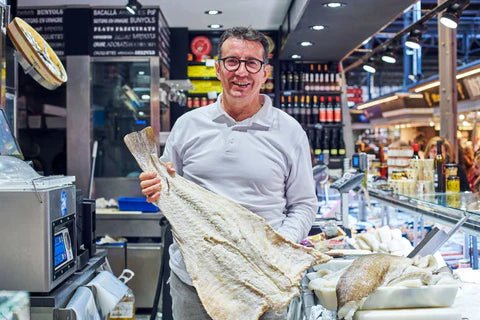
Cleaning anchovies is a task that requires patience and concentration, but it has a meditative quality. It's the kind of manual work with a clear and satisfying gastronomic result that more and more home cooks appreciate. At the Mercat del Ninot in Barcelona, we have been selling whole salt-cured anchovies and teaching customers how to clean them for 35 years. The final result, on a slice of sourdough bread with a drizzle of oil and a good white wine, justifies every minute of the process.
Materials Needed Before Starting
No special equipment is needed. However, it is important to have everything prepared before starting, because the process has waiting times that are better utilized if the materials are ready.
Utensils
- Two or three medium bowls (for desalting water and for clean fillets)
- Kitchen tweezers or eyebrow tweezers (to remove fine residual bones)
- Small, sharp knife, or simply your fingers (to open and fillet)
- Sufficient quantity of absorbent kitchen paper
- Airtight glass jar or container for final packaging
Ingredients
- Whole salt-cured anchovies (as many as you want to clean)
- Cold tap water, enough for several changes
- Quality extra virgin olive oil — don't skimp here, the oil is part of the final flavor
- Optional: garlic clove, bay leaf, chili, lemon peel to flavor the oil
Workspace
Work on a clean and spacious surface. The process is clean if done in an organized manner — salt and anchovy juice stain minimally. Keep kitchen paper handy from the start and a waste bag nearby for bones, heads, and skin.
Step 1: Desalting, the Most Important Stage
Desalting is the stage that most affects the final result and has the most room for error. An insufficiently desalted anchovy will be overwhelmingly salty; an over-desalted one will lose character and flavor. The goal is to remove excess salt from the surface and outer layers of the muscle, not the salt that is integrated into the tissue as a result of curing.
Desalting time: base reference
Whole salt-cured anchovies need between 30 minutes and 2 hours of desalting in cold water, depending on the thickness of the fish and the intensity of salt you are looking for. The base reference for a standard-sized fish is 45-60 minutes with two water changes.
- 30-45 minutes: anchovy with character, noticeable saltiness. Ideal for those who like it intense.
- 45-75 minutes: the balanced point for most uses. Full flavor, salt present but not dominant.
- 90-120 minutes: milder anchovy, ideal for dishes where anchovy is a nuance and not the protagonist, or for salt-sensitive palates.
The procedure
Place the whole anchovies in a bowl with cold tap water. Do not use hot water — it alters the muscle texture. Let them soak for 20-25 minutes, change the water, and soak for another 20-25 minutes. Taste an anchovy by running your finger over the surface and trying a small portion of the muscle — if the salt is tolerable and the fish flavor is present, desalting is sufficient. If it is still too salty, change the water once more and wait an additional 15-20 minutes.
Do not soak the anchovies in the refrigerator unless the desalting will exceed 2 hours. For standard times, room temperature is perfect and the variation is minimal.
Signs of correct desalting
A well-desalted anchovy has muscle that is slightly more flexible than before soaking, the characteristic reddish-pink color with no visible changes, and when gently pressed with a finger, the tissue yields without falling apart. An over-desalted anchovy has excessively soft muscle and the color may turn to a paler pink. An under-desalted anchovy still has a clearly saline outer surface to the touch.
Step 2: Opening and Filleting the Anchovy
Once desalted, remove the anchovies from the water and place them on kitchen paper. Lightly pat them dry on the outside — just for handling, not to dry them thoroughly (that comes later).
The opening technique
Hold the anchovy by the tail with one hand. With the thumb and index finger of the other hand, hold the fish's belly just below where the head was (it's no longer there, but the cut is visible) and gently press outwards. The fish should open into two fillets along the central bone with very little resistance if desalting has been adequate.
If the fish resists, it's a sign that it needs a few more minutes of soaking — the salt has still hardened the connective tissue around the bone. Put it back in water for another 10-15 minutes before trying again.
Removing the central bone
Once the fish is opened butterfly-style, you will clearly see the central bone. Hold the tail with two fingers, slide the thumb of the other hand under the central bone from the tail towards the head and gently lift. The bone should come out in one piece with relative ease. If it breaks, no problem — remove the rest with your fingers or tweezers.
The result is two fillets joined at the back. You can separate them completely or leave them butterfly-style — both presentations are valid for final packaging. At Bacalalo, we always separate them: it allows for more compact packaging and more uniform oil distribution.
Step 3: Cleaning Bones and Skin
This is the most laborious stage and the one that most distinguishes a professional result from an amateur one. The anchovy has small lateral bones on both sides of the fillet and, in some specimens, fine skin remnants on the outer surface of the muscle.
Lateral bones
Run your index finger over the inner surface of the fillet (the one that was attached to the central bone) from tail to head. You will notice the tips of the lateral bones as small prominences. Remove them with tweezers, pulling in the direction of the bone (always from tail to head, never perpendicularly — this prevents tearing the muscle). In a standard specimen, there are between 8 and 14 lateral bones per fillet.
For regular home use, removing 90% of the bones is sufficient — the small residual ones are harmless. For a restaurant-quality result, apply more pressure with your finger and dedicate 2-3 minutes per fillet.
The skin
The skin of salt-cured anchovies is thin and edible. Some consumers remove it, others leave it. To remove it, hold the fillet by the tail and slide your thumb between the skin and the muscle with a gentle movement. It comes off without resistance in well-cured specimens. Leaving it is equally correct and adds a slight additional flavor to the oil during preservation.
The expected result
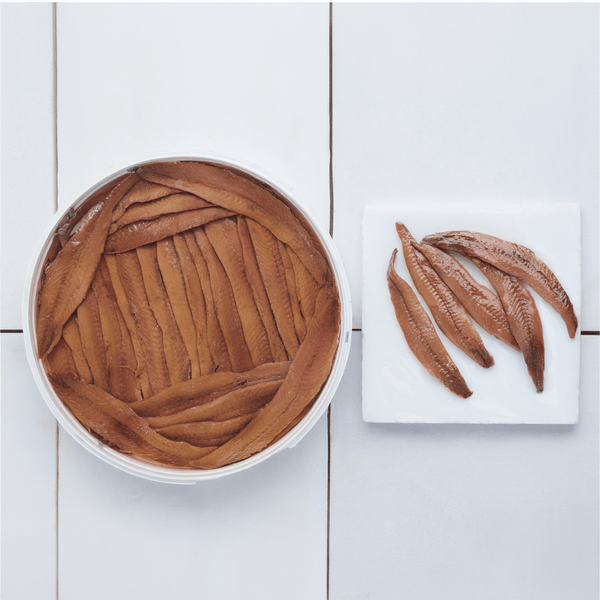
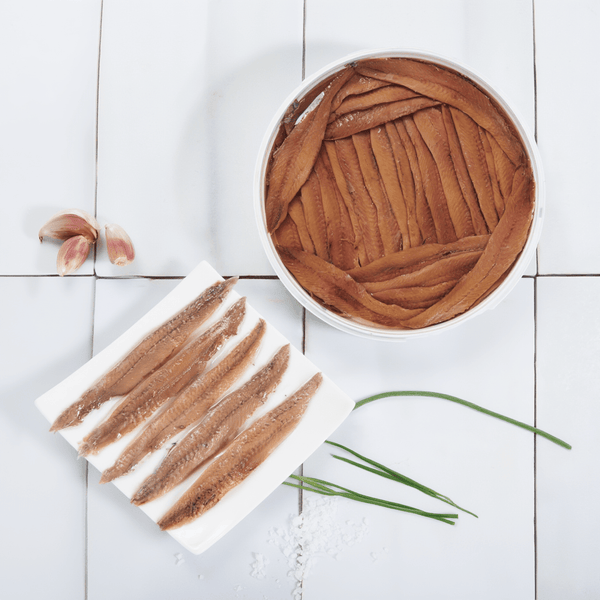
A well-cleaned fillet has the characteristic uniform reddish-pink color, no visible bones, with the firm but flexible texture typical of a properly cured anchovy. If the fillet is excessively soft or falls apart when handled, it may indicate insufficient curing of the original product or too long a desalting period.
Step 4: Properly Drying the Fillets
Drying is a stage that is often underestimated and has a direct impact on the quality of the final packaging. Fillets with residual moisture dilute the oil, reduce the product's shelf life, and can encourage mold growth on the surface if water pockets remain under the oil.
The drying technique
Place the fillets on several layers of absorbent kitchen paper. Cover with another layer of paper and press gently with the palm of your hand — without rubbing, just uniform pressure. Remove the damp paper and repeat with dry paper. The goal is to remove visible surface moisture, not to desiccate the muscle.
For optimal results, leave the fillets on clean, dry kitchen paper for 15-20 minutes at room temperature before packaging. In summer, with heat, 10 minutes is sufficient. The anchovy is ready for packaging when there is no moisture left on your fingers when you touch the surface.
What not to do
Do not use scented or antibacterial-treated kitchen paper — anchovies absorb aromas very easily. Do not place the fillets in direct sunlight or near a direct heat source — heat alters the texture. Do not leave them on paper for more than 45 minutes — the anchovy will dry out excessively and the characteristic melt-in-your-mouth texture will be lost.
Step 5: Preserving in Olive Oil
Packaging in oil is the final step and determines the product's flavor over the following weeks. The choice of oil is as important as the quality of the anchovy.
What oil to use
Extra virgin olive oil, always. Salt-cured anchovies have spent months curing — it's worth protecting that work with an oil of equal quality. A mild or medium-flavored extra virgin oil (Arbequina, Hojiblanca) complements the anchovy without competing with it. A refined olive oil or sunflower oil would be an insult to the product; an oil with excessive bitterness or spiciness would dominate the anchovy instead of enhancing it.
Approximate quantity: for a 250 ml jar, you need approximately 150-180 ml of oil, depending on how much the fillets are compressed when placed.
The packaging process
Use a clean, dry glass jar with an airtight seal. Place a layer of fillets at the bottom, all oriented in the same direction for compact packaging. Cover with oil. Add another layer of fillets and cover again with oil. Repeat until the jar is full. The last layer should be covered by at least 5 mm of oil on top.
Close the jar, gently invert it a few times to distribute the oil, and refrigerate. The product will be at its optimal point after the first 24-48 hours in oil — the initial rest allows the oil to penetrate the tissue and harmonize the flavor.
Optional flavorings
For an aromatic variation, you can add to the jar before sealing: half a finely sliced garlic clove (remove after 3-4 days to prevent it from dominating), a small dried chili, a small sprig of fresh thyme, or a strip of lemon peel. These flavorings are optional — quality anchovies don't need them, but they can add an interesting dimension for specific uses.
To delve deeper into long-term preservation techniques, consult our guide on how to store open anchovies and anchovies in oil.
Professional Tips for a Perfect Result
After 35 years selecting and selling anchovies at Mercat del Ninot in Barcelona, we have seen the most frequent mistakes and the details that make the difference between an acceptable home result and a truly good one.
Tip 1: Desalting water temperature
Always use cold water. If the water is lukewarm or hot, the muscle tissue softens excessively, and the fillets break when handled. In summer, if the tap water is above 20 °C, add a few ice cubes to the desalting bowl. The difference in the integrity of the final fillet is noticeable.
Tip 2: Dry more than seems necessary
Residual moisture is the silent enemy of oil packaging. Professionals dry the fillets longer than seems necessary — 20-25 minutes on absorbent paper is the norm, not the exception. A perfectly dry fillet in extra virgin olive oil will keep for 3-4 weeks without problems. A fillet with residual moisture can start to deteriorate in 7-10 days.
Tip 3: Oil at room temperature
Pour the oil at room temperature, not straight from the refrigerator. Cold oil has more viscosity and does not penetrate the fillet tissue well during the first few hours. Room temperature oil flows better between the fillets and ensures uniform coverage from the outset.
Tip 4: Initial resting before first consumption
Freshly packed anchovies in oil have not yet reached their peak. The oil needs between 24 and 48 hours to penetrate the tissue and soften the overall profile. Packed today, they will be perfect the day after tomorrow. If you try them 10 minutes after packing, the result will seem drier and saltier than it will ultimately be.
Tip 5: Use the oil from the jar
The oil in which the anchovies have rested absorbs all the flavors of the curing process — umami, marine notes, aromatic complexity. When you finish the jar, save the oil. It is excellent for dressing salads, making anchovy vinaigrette, toasting bread slices, or adding to pasta. Professionals never throw it away.
How long do homemade prepared anchovies last?
The shelf life of a homemade anchovy prepared in olive oil depends on three variables: the quality of the prior drying, the airtightness of the jar, and the storage temperature.
Refrigeration
With proper drying (moisture-free fillets), extra virgin olive oil completely covering the fillets, and an airtight jar in the refrigerator at 4-6 °C, homemade anchovies last between 3 and 4 weeks under optimal conditions. After the second week, the flavor profile continues to evolve positively — anchovies that have been in oil for 2-3 weeks are usually rounder and less aggressive than freshly prepared ones.
Signs of spoilage
An anchovy in oil that has spoiled will show: a color change towards gray or green tones, a sour or rancid smell when opening the jar, a very soft or gelatinous texture, or visible mold on the surface (generally on fillets that were not completely covered by the oil). If you observe any of these signs, discard the entire jar — this is not a product where there are safety gray areas.
Freezing: not recommended
Anchovies in oil are not suitable for freezing. The muscle tissue structure of cured anchovies does not tolerate the freezing-thawing cycle without losing the melting texture that makes them valuable. If you want to have a reserve, the most efficient way is to keep the salt-cured anchovies uncleaned (which can be stored for months in their original salt in the refrigerator) and clean them in small batches as needed.
For more information on how to enjoy Cantabrian anchovies and what varieties exist, consult our complete guide to Cantabrian anchovies: brands, sizes, and how to choose.
Premium Seafood Products — Bacalalo
Since 1990, selecting the best seafood from Mercat del Ninot, Barcelona. Refrigerated shipping 24-48h.
View Cantabrian Anchovies →🛒 Related Products from Bacalalo
Cantabrian Anchovies "00" Gourmet Selection
Premium 00 size, artisan elaboration
38,90€
View product →⭐ 4.9/5 · Cold shipping 24-48h · Since 1990 at Mercat del Ninot
Frequently Asked Questions
How long do salt-cured anchovies need to be desalted?
The standard desalting time for whole salt-cured anchovies is 45 to 75 minutes in cold water with two changes of water. For a milder salt point, up to 90-120 minutes. For a more intense point, 30-45 minutes are sufficient. The main variable is the thickness of the specimen: larger anchovies of size 00 may need an additional 15-20 minutes compared to size 0. Always taste a small portion before finishing the desalting to adjust the time to your preference.
What oil should I use to preserve anchovies at home?
Extra virgin olive oil, always. It is the oil used by artisan canneries and the one that best complements the flavor profile of cured anchovies. Use a mild or medium-flavored extra virgin olive oil (Arbequina, Hojiblanca) so as not to compete with the anchovy. Sunflower oil or refined olive oil are inferior options that reduce the flavor and shelf life of the product. Oil is part of the final flavor — it is not the place to save money.
Why do the fillets break when cleaned?
The most frequent causes are: insufficient desalting (the connective tissue is still stiff from the salt), desalting water that is too hot (which excessively softens the muscle), or a short curing of the original product (which produces a less cohesive muscle). The solution for fillets that break due to salt: more soaking time. For fillets that break due to excessive softness: reduce soaking time and dry faster. A fillet that falls apart when handled usually indicates a lower quality product at the source.
What is the yield of a salt-cured anchovy?
The yield of clean fillet is approximately 40-50% of the gross weight of the salt-cured anchovy, depending on the size of the specimen. A quarter of a kilo (250 g) of whole salt-cured anchovies yields between 100 and 125 grams of clean fillet in oil. Larger specimens (size 00) have a slightly higher yield due to the proportion of muscle to bone. If you calculate your purchase based on the final clean weight you need, multiply the weight of salt-cured anchovies to buy by 2 as a conservative reference.
Can salt-cured anchovies be cleaned without soaking them?
It is not recommended. Soaking is necessary for two reasons: first, to remove excess salt from the surface and outer layers of the muscle; second, to slightly rehydrate the tissue and facilitate opening the anchovy without breaking it. Without soaking, the fillet has too much salt to be pleasant and the texture is hardened, which makes it very difficult to remove the central bone without destroying the muscle. There is no effective way to clean quality salt-cured anchovies without the desalting step.
How long do prepared anchovies in oil last in the refrigerator?
With a correct process (well-dried fillets, extra virgin oil, airtight jar), homemade prepared anchovies last between 3 and 4 weeks in the refrigerator at 4-6 °C. The critical condition is that the fillets must be completely covered by the oil at all times — if any fillet is exposed to air, it can spoil in a few days. Compare this to an open can, which only lasts 5-7 days: the airtight jar in oil is significantly more durable than the open can.
Is there a difference between cleaning anchovies from Santoña or l'Escala at home?
The cleaning process is practically identical for both, but there are differences in desalting time. Santoña and Cantabrian anchovies usually have a longer curing time and salt that is more integrated into the tissue, which may require a slightly longer desalting (60-90 minutes). L'Escala anchovies have a different curing profile and in many cases a slightly milder salt, which may require less soaking time (30-60 minutes). Always taste during the process to adjust to your preference.